Building a Real Time .NET Transcription Service
Building speech to text transcription services has never been easier. In this demo you will be building an extremely simple, yet powerful, real-time transcription service in ASP.NET using Nexmo’s .NET SDK and Microsoft Azure’s Speech SDK.
Prerequisites
- Visual Studio 2019 version 16.3 or higher
- A Nexmo account Sign up here
- An Azure Account
- Optional: Ngrok for test deployment
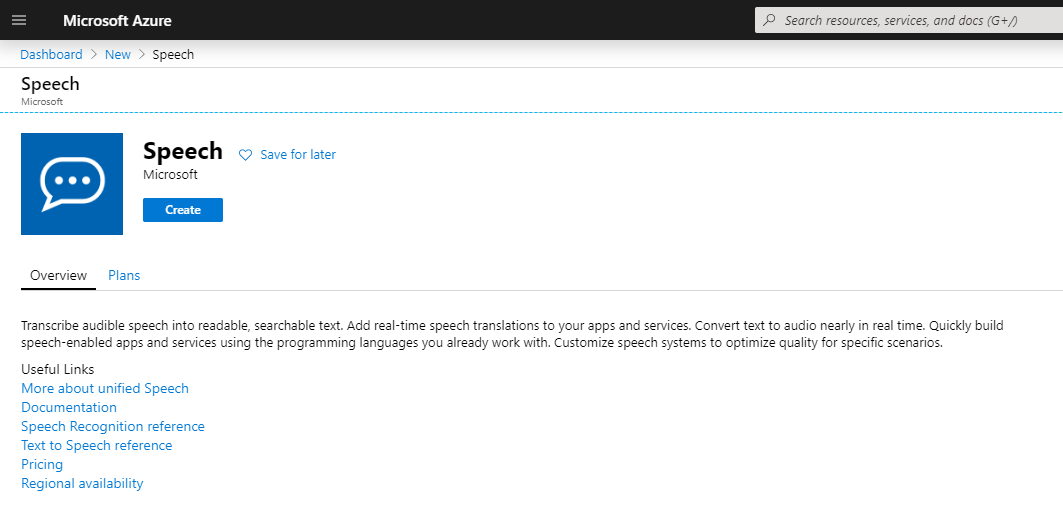
Create Azure Cognitive Services Resource
- Go to your Azure Dashboard
- Open the Hamburger menu and select “Create Resource”
- Search for Speech and Create a Speech Resource:
- Fill out the create form. For demonstrative purposes, you can use the following inputs
- Name: TranscriptionTest
- Subscription: pay-as-you-go
- Location: East US
- Pricing Tier: F0
- Resource Group: Transcription
This will take some time to spin up. Once it’s deployed you are going to navigate to the Quick Start Section to gather your access keys. You are looking for the Key1 value, so search for the highlighted section:
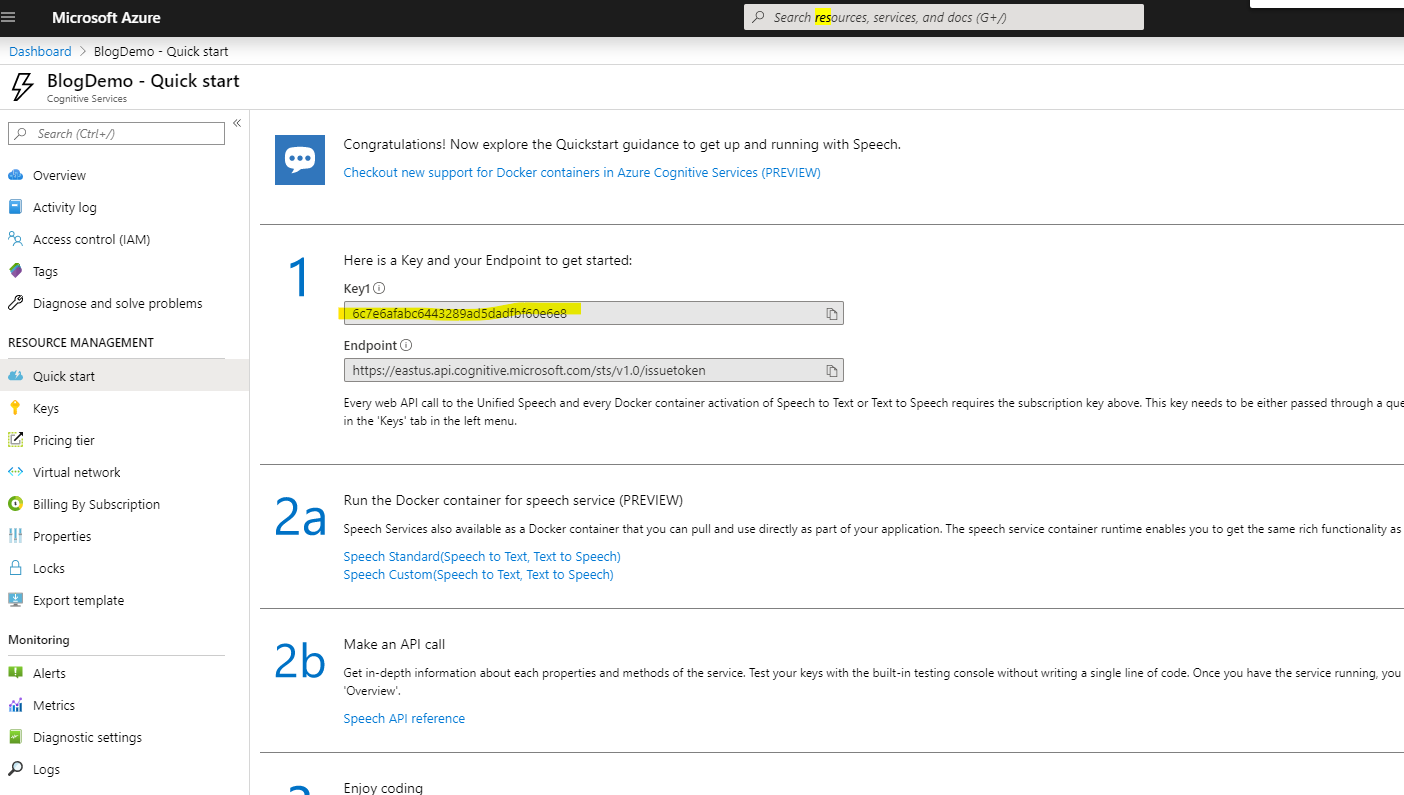
Save this key value offline somewhere for the moment.
Building the Real Time Transcription Service
Project Setup
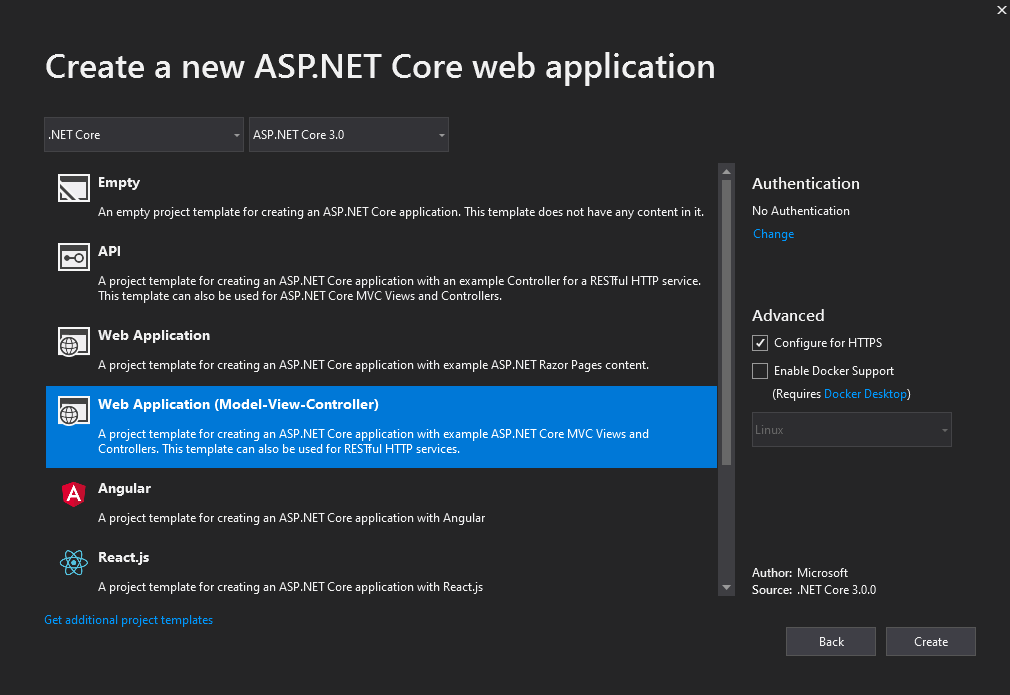
Open Visual Studio and create a new project ASP.NET Core WebApplication. For example, “TranscriptionBlogPostDemo”
Now, you’ll create an MVC web application for this demonstration in ASP.NET Core 3.0.
With this created, add the following nuget packages to the project:
- Nexmo.Csharp.Client
- Newtonsoft.Json
- Microsoft.CognitiveServices.Speech
Transcription Engine
With these projects imported, create a new class called TranscriptionEngine.
First, define some constants for the benefit of both the speech SDK and for managing the WebSocket buffer.
const int SAMPLES\_PER\_SECOND = 8000;const int BITS\_PER\_SAMPLE = 16;const int NUMBER\_OF\_CHANNELS = 1;const int BUFFER\_SIZE = 160 \* 2;Next, add the following field to the class:
- _config – this will hold the subscription/regional info of the speech analyzer. The region in the demo is eastus – derived from the region you configured your speech service for. For a mapping of region to input string see the Microsoft Azure Speech Service Supported Regions Documentation
- _inputStream – this is going to be a push Stream that will serve as the buffer that will be streamed over to the Azure Speech-to-text service
- _audioInput – this will be the input for the speech recognizer
- _recognizer – this will be the recognizer that will perform the speech recognition task
These can be defined like so:
SpeechConfig \_config = SpeechConfig.FromSubscription("your\_subscription\_key", "your\_azure\_region"); // e.g. eastusPushAudioInputStream \_inputStream = AudioInputStream.CreatePushStream(AudioStreamFormat.GetWaveFormatPCM(SAMPLES\_PER\_SECOND, BITS\_PER\_SAMPLE, NUMBER\_OF\_CHANNELS));AudioConfig \_audioInput;SpeechRecognizer \_recognizer;Given several of the fields are IDisposable’s, have this class implement IDisposable and simply dispose of all the disposable fields on its way down
public void Dispose(){ \_inputStream.Dispose(); \_audioInput.Dispose(); \_recognizer.Dispose();}Then add a constructor that will initialize the _audioInput with the push input stream defined above:
public TranscriptionEngine(){ \_audioInput = AudioConfig.FromStreamInput(\_inputStream);}Next, add the method that will listen for speech recognition events from the recognizer
private void RecognizerRecognized(object sender, SpeechRecognitionEventArgs e){ Trace.WriteLine("Recognized: " + e.Result.Text);}From here, you can add a function to stop and start the speech recognizer.
The start method accepts a language string, sets the language of the SpeechConfig, initializes the recognizer with the config and audio input source, registers the RecognizerRecognized event you created earlier, and starts a Continuous Recognition.
Your stop method will unregister the RecognizerRecognized event and stop the recognizer.
NOTE: The StopContinuousRecognitionAsync can take upwards of 20 seconds as there isn’t a mechanism to cancel the currently running input stream as of this writing. This demo explicitly mitigates this issue by not reusing the recognizer between calls, and not blocking the shutdown of the socket for this to complete.
public async Task StartSpeechTranscriptionEngine(string language){ \_config.SpeechRecognitionLanguage = language; \_recognizer = new SpeechRecognizer(\_config, \_audioInput); \_recognizer.Recognized += RecognizerRecognized; await \_recognizer.StartContinuousRecognitionAsync();}private async Task StopTranscriptionEngine(){ if(\_recognizer != null) { \_recognizer.Recognized -= RecognizerRecognized; await \_recognizer.StopContinuousRecognitionAsync(); }}The final task this class is going to take on is going to be to receive audio on the websocket you will be setting up, and pushing it through to the PushAudioStream you created earlier. This will be awaited after the websocket is established and will continue to be until the websocket is closed.
public async Task ReceiveAudioOnWebSocket(HttpContext context, WebSocket webSocket){ var buffer = new byte[BUFFER\_SIZE]; try { var language = "en-US"; await StartSpeechTranscriptionEngine(language); WebSocketReceiveResult result = await webSocket.ReceiveAsync(new ArraySegment<byte>(buffer), CancellationToken.None); while (!result.CloseStatus.HasValue) { await webSocket.SendAsync(new ArraySegment<byte>(buffer, 0, result.Count), result.MessageType, result.EndOfMessage, CancellationToken.None); result = await webSocket.ReceiveAsync(new ArraySegment<byte>(buffer), CancellationToken.None); \_inputStream.Write(buffer); } await webSocket.CloseAsync(result.CloseStatus.Value, result.CloseStatusDescription, CancellationToken.None); } catch (Exception e) { Trace.WriteLine(e.ToString()); } finally { await StopTranscriptionEngine(); }}NOTE: The initial buffer you get back from the websocket will contain metadata for the call—and should you wish, you may extract this data from the first ReceiveAsync—for the sake of the demo, this is not done, as the buffer and Recognizer are robust enough to manage.
Setting up WebSockets in Your App
Open Startup.cs.
In the Configure method, you will enable websockets on the server and provide a piece of websocket middleware to use websockets, and to connect an inbound websocket and use the TranscriptionEngine to receive audio over said socket.
var webSocketOptions = new WebSocketOptions(){ KeepAliveInterval = TimeSpan.FromSeconds(120), ReceiveBufferSize = 320};app.UseWebSockets(webSocketOptions);app.Use(async (context, next) =>{ if (context.Request.Path == "/ws") { if (context.WebSockets.IsWebSocketRequest) { WebSocket webSocket = await context.WebSockets.AcceptWebSocketAsync(); using (var engine = new TranscriptionEngine()) { await engine.ReceiveAudioOnWebSocket(context, webSocket); } } else { context.Response.StatusCode = 400; } } else { await next(); }});Setting up the Voice Controller
The last piece of code that needs to be implemented is to add a Voice Controller. Add a new controller under the Controller file and name it VoiceController. Add a constant string for the BASE_URL of your service.
const string BASE\_URL = "BASE\_URL";Your Voice Controller will have two HTTP requests. A POST request for the event webhook, and a GET request the answer webhook. This GET request is going to construct an NCCO with a single connect action which will instruct the Voice API to open a WebSocket to your server and push the audio stream back over that socket. Set the Content type to a 16 bit linear PCM running at 8kHz. See below:
[HttpPost]public HttpStatusCode Events(){ return HttpStatusCode.OK;}[HttpGet]public string Answer(){ var webSocketAction = new ConnectAction() { Endpoint = new[] { new WebsocketEndpoint() { Uri = $"wss://{BASE\_URL}/ws", ContentType="audio/l16;rate=8000", } } }; var ncco = new Ncco(webSocketAction); return ncco.ToString();}Getting Up and Running
Setting up IIS Express
Open the properties dialog for your project, under debug take note of the port number – for the demo, disable SSL, which will make setting up ngrok easier.
Setting up the Ngrok Tunnel
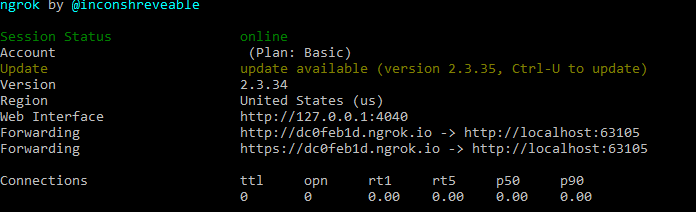
For the Voice API to forward the the Event/Answer webhooks you need to expose the site to the internet – for testing purposes, you can use ngrok to expose our IIS express port. Open up your command line and use this command, replace PORT_NUMBER with your IIS Express instance’s port number.
ngrok http --host-header="localhost:PORT_NUMBER" http://localhost:PORT_NUMBER
This command produces an output like this:
Setting up the Nexmo Voice Application
The next step is going to be setting up a Nexmo Voice Application.
- Navigate to your Nexmo Dashboard
- In the left-hand pane open Voice, and click on ‘Create an application’
- Name the application, e.g. ‘TranscriptionTest’
- Under Capabilities enable Voice
- For Event URL add base_url_of_ngrok_tunnel/voice/events
- For Answer URL add base_url_of_ngrok_tunnel/voice/answer
- For Fallback answer URL add base_url_of_ngrok_tunnel/voice/answer
Final Touches
Now that you have the ngrok URL, change the BASE_URL in the VoiceController file to that url (excluding the ‘http://’)
With this, you are up and running. Call the Nexmo Number linked to your application, and the App will transcribe your speech to the debug console.
Additional Links Resources
- More Resources for Nexmo
- Nexmo .NET Server SDK
- Azure Cognitive Services Speech SDK
- Using WebSockets with the Nexmo Voice API
- .NET Speech to Text Demo Application
The post Building a Real Time .NET Transcription Service appeared first on Nexmo Developer Blog.