How to Receive SMS Delivery Receipts with ASP.NET Core MVC

After sending an SMS message, it’s good to validate that the message was delivered to its destination. Fortunately, that’s a functionality you can easily build with ASP.NET. In this example, we’ll be receiving a webhook from the Vonage SMS API and printing the JSON in that webhook out to the console.
Sample Repo
If you want to skip the step-by-step and just play with the sample, the code is available on GitHub.
Prerequisites
- The latest version of the .NET Core 3.1 SDK
- Either Visual Studio 2019, Visual Studio for Mac, or Visual Studio Code—I will be using Visual Studio Code for this demo
- I’m sending an SMS message with the Nexmo CLI. You can use that, or you could even add your own send logic to this app!
- Optional—I used ngrok to test this demo
Vonage API Account
To complete this tutorial, you will need a Vonage API account. If you don’t have one already, you can sign up today and start building with free credit. Once you have an account, you can find your API Key and API Secret at the top of the Vonage API Dashboard.
Build the App
Create the App
Open up your console and navigate to the directory you’d like to create the project in. When you’re at the correct, directory run the command:
dotnet new mvc -n ReceiveDlrAspNetNow cd into ReceiveDlrAspNet and add the Nexmo.Csharp.Client package using the following command:
dotnet add package nexmo.csharp.clientOpen up this directory in VS Code.
Add the Route
Next, we’ll add the delivery receipt route to our home controller. Open Controllers\HomeController.cs and add the following to the HomeController class:
[HttpPost("/webhooks/dlr")]
public async Task<IActionResult> HandleDlr()
{
    using(var reader = new System.IO.StreamReader(Request.Body))
    {
        var json = await reader.ReadToEndAsync();
        Console.WriteLine(json);
    }
    return NoContent();
}
Testing
From a development perspective, that’s all we needed to do, so let’s go ahead and get into testing. We’re going to test this with ngrok, which allows us to build a publicly accessible tunnel to our app. This is useful when we need to expose publicly available HTTP endpoints to our apps. If you are going to be testing this with IIS Express, you will want to check our explainer on the subject as there are special considerations. What this boils down to is that we need to add a --host-header option when we start up ngrok.
Configure Kestrel or IIS Express
Open Properties\launchSettings.json. You’ll notice two objects in here: iisSettings and profiles. profiles has two items, IIS Express and ReceiveDlrAspNet (assuming that’s what you named your project). If you are running in IIS Express, change the applicationUrl of the iisSettings object to http://localhost:5000 and set the sslPort to 0. If you are using kestrel (like I am), go ahead and delete the https://localhost:5001 section of the ReceiveDlrAspNet object. Both of these will effectively make the app run on localhost:5000, which will allow us to get ngrok to forward messages.
Start the App
In your terminal, run the command dotnet run.
Start Ngrok
Start ngrok by using the following command:
ngrok http --host-header="localhost:5000" 5000This will pop up a screen that looks like:
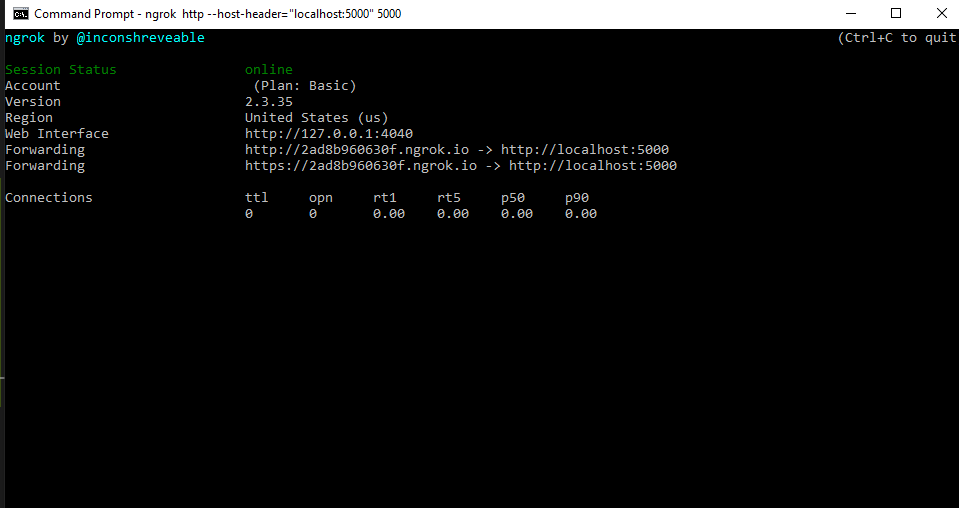
If you navigate to the forwarding address for HTTP (in my case http://2ad8b960630f.ngrok.io, but the 2ad8b960630f part will vary on the ngrok free plan), you will see the generic welcome page for an ASP.NET Core app. We didn’t change any of the views, so that means your app is up and accessible!.
Configure Your Webhooks
The last thing we need to do before we’re ready to receive webhooks is to tell Vonage where to send the webhooks—in my case, I want them sent to the endpoint accessible at http://2ad8b960630f.ngrok.io/webhooks/dlr. To do this, navigate to the settings page of the dashboard and set the Delivery receipts setting to the your own endpoint address. Also, set the HTTP Method to POST-JSON, as we’re assuming it’s a POST request with a JSON payload.
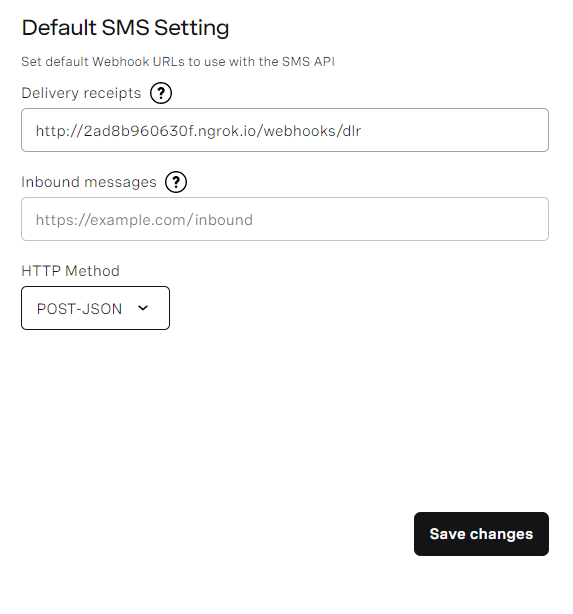
Click the save button, and you’re all configured to receive SMS delivery receipts!
Send an SMS
For this example, I’m sending an SMS with the nexmo CLI. It’s as easy as running:
nexmo sms -f VONAGE\_NUMBER YOUR\_CELLPHONE\_NUMBER "Testing DLR"Enter confirm to send, and in the console where your app is running you’ll see something along the lines of:

Resources
- The code for this tutorial can be found in GitHub
The post How to Receive SMS Delivery Receipts with ASP.NET Core MVC appeared first on Vonage Developer Blog.